Debugging with BIST
To use the BIST function, you need a loopback design, in which the transceiver transmits data and then receives it back. You can use internal parallel or serial loopbacks, or an external serial loopback. You access the BIST function through the transceiver's APB interface.
Note: The Efinity includes a loopback project that you can use for testing with
the transceivers BIST function.
In the Transceiver Debugger, click the BIST tab to set up the test.
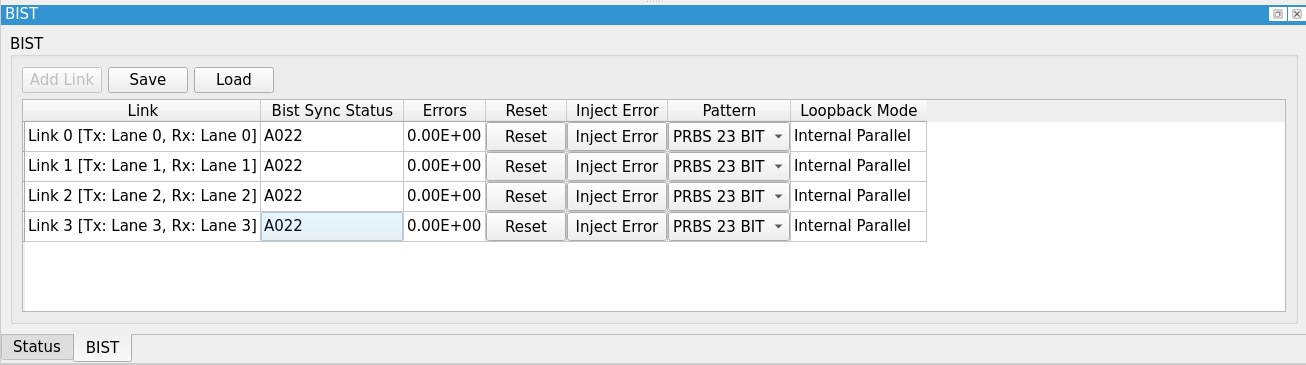
- Click Add Link to add lanes. The Link column shows the list of links.
- Bist Sync Status shows a hex value indicating whether the
link is running or has an error:
A022—BIST is running.A02A,A02E—An error occurred. The value toggles betweenA02AandA02E.A020—BIST is not running.
- Errors shows the current error count as an exponential sum.
- Click Reset to reset the link's error count to 0.
- Click Inject Error to force a 2-bit transmit error on the link.
- In the Pattern menu, choose the sequence type for testing. Currently the debugger only supports a pseudo-random binary sequence (PRBS).
Important: If the transceiver is in BIST mode, it can only be used for testing. Re-program the
FPGA to use the transceiver for regular data transmission.