Using the Efinity Bitstream Security Key Generator

About this task

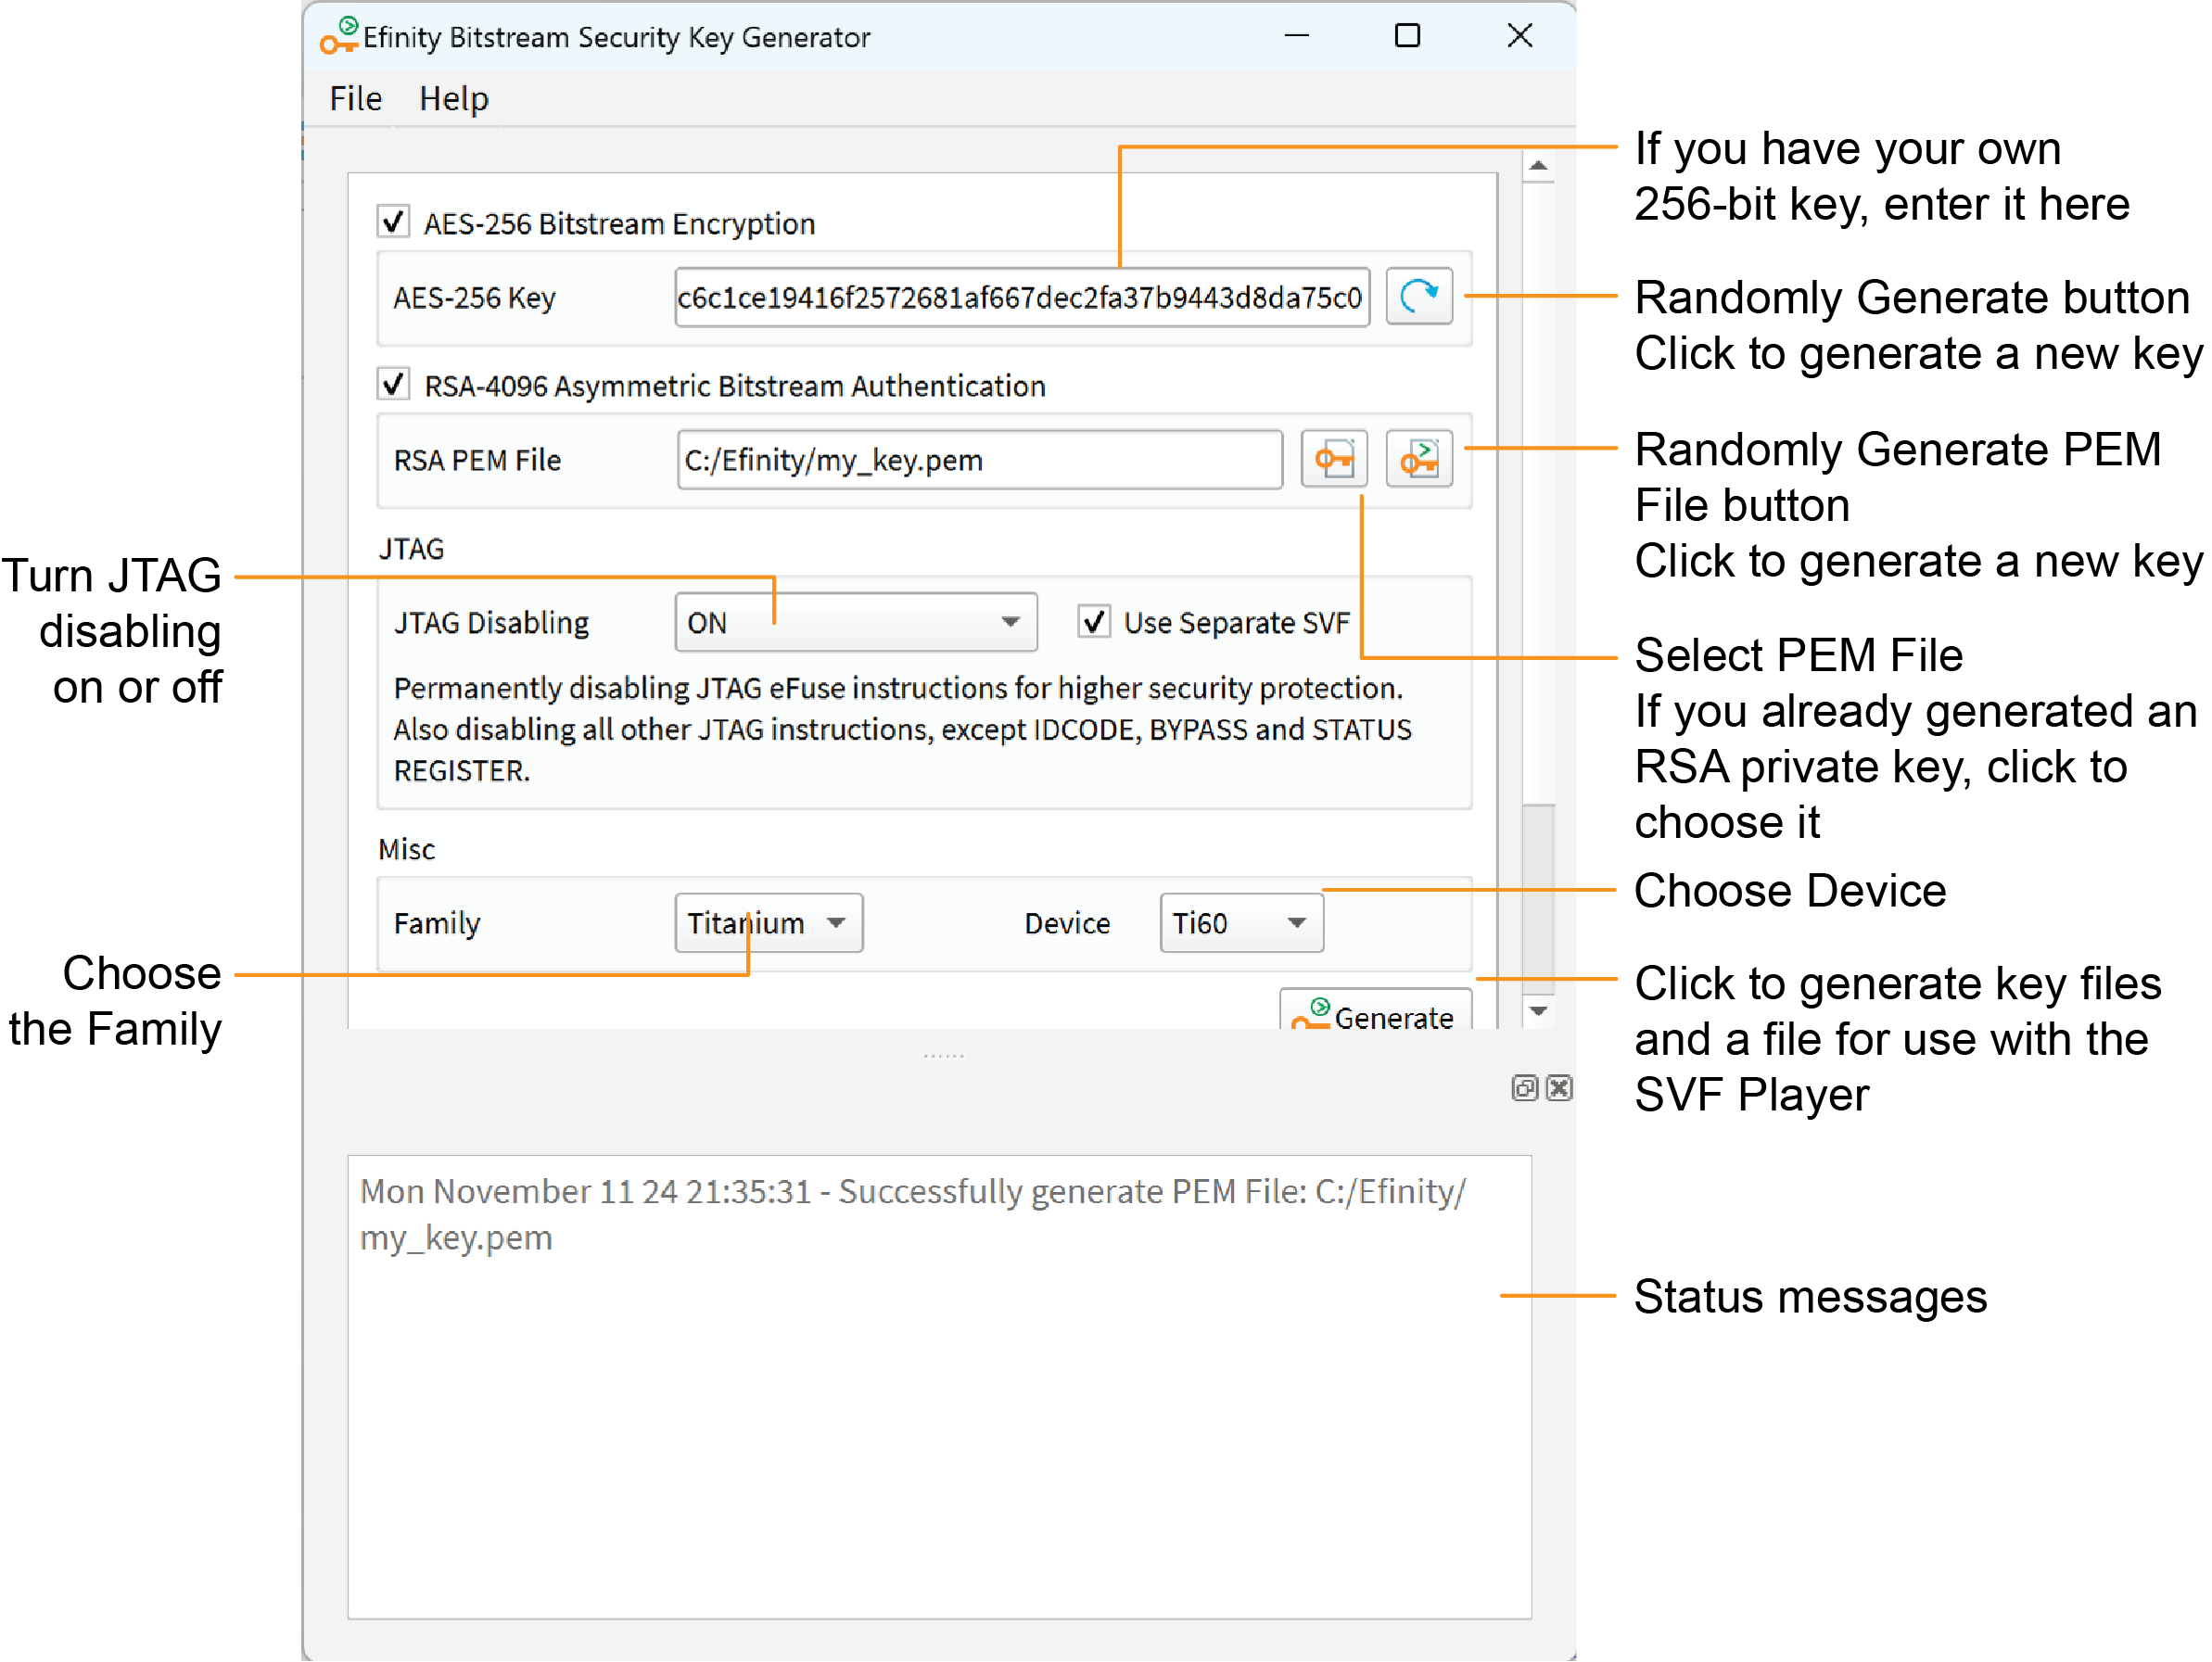
The key generator tool simplifies the process of creating encryption keys and generating RSA certificates. You access this tool in the Efinity main menu at Tools > Open Key Generator. You can use the key generator without opening a project.

Note: You can use the Efinity Bitstream Security Key Generator iteratively. That is, you can first use encryption and later add in RSA authentication, and even later disable JTAG commands. Refer to Workflow for Using Security Features for more information.
Figure 1. Efinity Bitstream Security Key Generator

Procedure

  1. If you want to use encryption:
    1. Turn on AES-256 Bitstream Encryption.
    2. Click the Randomly Generate button to generate a 256 bit key. The software populates the AES-256 Key box with the generated key.
    3. Alternatively, if you already have a key, you can enter it into the AES-256 Key box.
  2. If you want to use authentication:
    1. Turn on RSA-4096 Asymmetric Bitstream Authentication.
    2. Click the Randomly Generate PEM File button.
    3. In the Generate AND Save PEM File dialog box, choose a location to save the .pem file and type a filename in the File name box.
    4. Click Open. The tool generates the private key and displays a message in the status box.
    5. Alternatively, click the Select PEM File button to load a private key (.pem) that you created already.
      Note: If you use another tool to create a private key, be sure to use the RSA-4096 algorithm. Titanium FPGA's only support authentication with this algorithm.
  3. If you are ready to turn off JTAG, choose ON or DISABLE_EFUSE_ONLY for JTAG Disabling. Otherwise, leave it set to OFF.
    OptionDescription
    OFF No JTAG disabling.
    Efinix strongly recommends that you use ON or DISABLE_EFUSE_ONLY to disable access to the JTAG efuse instructions for added security.
    ON Permanently disables the JTAG efuse instructions as well as all other JTAG instructions except for those used to get device information.
    DISABLE_EFUSE_ONLY
    Permanently disables the JTAG efuse instructions only. Other JTAG instructions are not affected, for example, you can still perform debugging.

    If you turn on the Use Separate SVF option, the software creates two SVFs: one for AES and/or RSA (<keyname>.svf) and one for JTAG disabling (<keyname>_jtag_disable.svf). Two files make it easy to use the key generator iteratively, and when you are done to disable JTAG.

    When the Use Separate SVF option is tuned off, the software creates one <keyname>.svf, which contains all applicable AES, RSA, and JTAG disabling commands.

    Important: Do not permanently disable JTAG unless you are really ready, that is, you are finished with all JTAG debugging and configuration tasks. After you disable JTAG, you cannot undo it. Use DISABLE_EFUSE_ONLY if you still want to perform debugging.
  4. Choose your FPGA.
  5. Click Generate.
  6. In the Select Output File dialog box, choose the location to save the .bin (key data) file and type a filename in the File name box.
  7. Click Open.

Results

The tool creates the following files:

  • <filename>.bin—This file contains key information. You specify it in the Project Editor when you turn on bitstream encryption and/or authentication.
  • <filename>.pem—This file contains your RSA private key. You use this file to sign the bitstream by specifying it in the Project Editor.
  • <filename>.svf—This file contains JTAG commands and key information. You use it with the Efinity SVF Player to blow the FPGA fuses.
Note: Efinix recommends that you save the 256-bit encryption key in a safe place so you have it in case you want to generate another .svf later (see Workflow for Using Security Features). You need to copy it from the AES-256 Key box and save it into a text file.